[참고] https://dev-jwblog.tistory.com/99
[Vue.js] Vue + SpringBoot + Mysql 를 이용한 Todo 구현(1) - 프로젝트 구성하기
Vue + SpringBoot + Mysql 를 이용한 Todo 구현(2) - 프로젝트 환경 설정하기 Vue + SpringBoot + Mysql 를 이용한 Todo 구현(3) - Todo API 개발하기(1) Vue + SpringBoot + Mysql 를 이용한 Todo 구현(4) - Todo..
dev-jwblog.tistory.com
1. Vue.js 설정
1-1. vue.config.js
① vue.js 파일을 build 했을 때 원래의 localhost:8080이 아닌, 스프링부트에서 설정한 port (8081)로 요청하게 변경
- proxy : 포트 변경해주는 역할
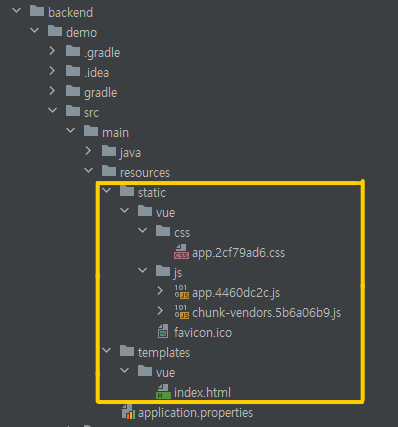
② backend 프로젝트 안에 읽어올 vue 파일 경로 설정
//  frontend의 vue.config.js

const path = require("path");

module.exports = {
  devServer: {
    proxy : 'http://localhost:8081'
  },
  indexPath: '../../templates/vue/index.html',
  publicPath: '/vue',
  outputDir: path.resolve(__dirname, "../backend/demo/src/main/resources/static/vue")
}
1-2. 빌드
① frontend 폴더로 이동 후, npm run build


② backend 프로젝트에 vue 관련 파일들 생성됨
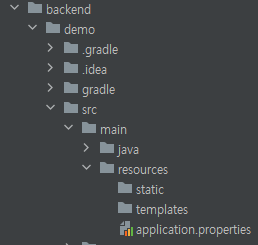
2. Spring Boot 설정
2-1. build.gradle 설정
dependencies {
	implementation 'org.springframework.boot:spring-boot-starter-data-jpa'
	implementation 'org.springframework.boot:spring-boot-starter-thymeleaf'
	implementation 'org.springframework.boot:spring-boot-starter-web'
	developmentOnly 'org.springframework.boot:spring-boot-devtools'

	implementation 'org.springframework.boot:spring-boot-starter-validation'

	implementation 'junit:junit:4.13.1'
	runtimeOnly 'com.h2database:h2'

	runtimeOnly 'mysql:mysql-connector-java'

	compileOnly 'org.projectlombok:lombok'
	annotationProcessor 'org.projectlombok:lombok'
	testImplementation 'org.springframework.boot:spring-boot-starter-test'
}
2-2. application.properties → application.yml


2-3. application.yml 설정
- 처음에 참고 블로그에서 datasource의 url 및 password까지 그대로 사용했다가 Run에서 계속 Error가 발생한 삽질을 했었다.
server:
  port: 8081

spring:
  datasource:
    driver-class-name: com.mysql.cj.jdbc.Driver
    url: jdbc:mysql://localhost:3306
    username: root
    password: (각자의 mysql password)
  h2:
    console:
      enabled: true

  jpa:
    hibernate:
      ddl-auto: create
    properties:
      hibernate:
        #show_sql: true
        format_sql: true
        default_batch_fetch_size : 100
    generate-ddl: true

logging:
  level:
    org.hibernate.SQL: debug
    org.hibernate.type: trace
3. Vue - Spring Boot 연동 확인
3-1. WebController.java 파일 생성
- backend / demo / src / main / java / com.example.demo / WebController.java
package com.example.demo;

import org.springframework.stereotype.Controller;
import org.springframework.web.bind.annotation.GetMapping;

@Controller
public class WebController {

    @GetMapping("/vue")
    public String vue() {

        return "vue/index";

    }
}
3-2. DemoApplication.java를 Run
① Run

② Run 이후 localhost:8081/vue 들어가보면 다음의 화면이 잘 등장함 (연결 성공 !)

'Spring > Spring Boot' 카테고리의 다른 글
| [Spring boot - OAuth2] OAuth란 ? (0) | 2022.11.12 |
|---|---|
| [Spring boot] application.yml의 이해 (0) | 2022.09.21 |
| [Vue.js - Spring Boot - MySQL] 프로젝트 생성 (0) | 2022.09.11 |
| [Spring Boot] lombok & Dto (0) | 2022.08.30 |
| [Spring Boot] Controller, ControllerTest (0) | 2022.08.29 |


